Well, I just did this, so I'll put in some pointers, even though this may be a partial repeat of other posts. The whole body of the machine is held together by the two plastic strips that run lengthwise, one on each side, with a rubber decorative strip over them (which has the "2100" name near the back).
THERE ARE NO SCREWS.
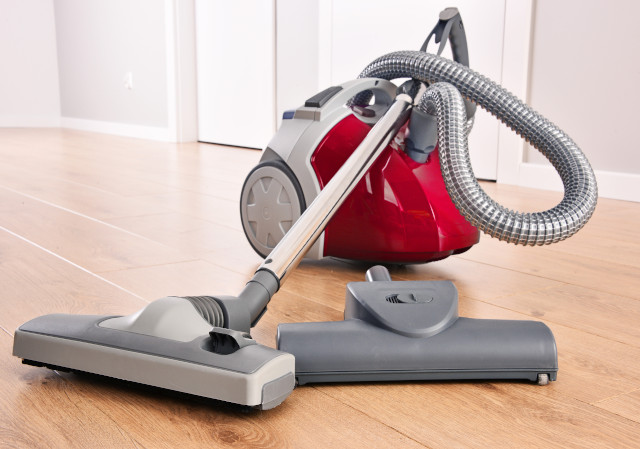
STEP 1. Unclick and remove the hose from the front.
STEP 2. Pop open the front and take out the bag.
STEP 3. At the front opening you will see the front ends of the rubber strips. These just stretch and fit over the plastic strips down the sides. Gently pull/pry the front end of the rubber forward, getting it out from behind the front edge of the plastic that holds it in. Then, the rubber strip will just peel out all the way down the body. Remove these two rubber strips now (one on each side).
STEP 4. Now, the tricky part. You really want to just grasp the end of the two plastic strips with a pair of needlenose pliers and slide them forward. But unseen to you are two plastic "teeth" in that strip, on the inside, angled inward and toward you, into holes in the body, which will prevent you from sliding it forward much more than about 1/8 of an inch. You have two options here.
Option 1: (not the best idea, but this works)
Using rather brute force, and a screwdriver, you will find that at the BACK of the machine, you can dig the blade of the screwdriver in between the back cover and the top, and in two spots, you'll see plastic posts that come DOWN from inside the top, and go through holes in the back cover, holding it on. If you pry the top UP enough, you can pry the posts high enough to come out of the holes in the back cover, and let the back cover go. You'll have to do the same thing on the bottom, and then you'll get the whole back cover off. After you've done this, you will find that you can grasp the BACK end of those two plastic strips running along the sides of the machine, and pull them BACKWARDS, all the way out. This is the way I did it, because I didn't understand how the machine came apart until I did this the first time. You can pry and remove that back cover without breaking anything, but you need to be careful.
Option 2: (The way Electrolux probably intends you to do it!)
Back at the front end of the machine, where you are trying to pull those plastic strips FORWARD, slip a thin flatblade screwdriver in between the white plastic strip and the gray machine wall. Pry so that the tip of the screwdriver moves IN (and the handle moves OUT). Thus, the tip will bend the machine wall inward, away from the white plastic strip. While you are doing this, pull on the end of the white plastic strip with needlenose pliers. When you get it just right, you will bend the machine wall inward just enough so the "teeth" in the plastic strip are now outside the holes in the body, and they will slide by and the strip will pull out.
You would also bend the screwdriver the OTHER way, and force the white plastic strip away from the body enough to clear the teeth. Either way should work.
THIS STEP IS VERY TRICKY, and you'll just have to feel around with the screwdriver until you release the teeth. But when you put it back together (below), I'll show you have to "change" things so you'll never have to do this again.
STEP 5:
Either way, now you've gotten those two white plastic strips pulled out, and the whole top of the unit will pull off like a giant clamshell. Work your way from the BACK first. To get the cord retractor out, you really don't need to pull the two halves completely apart, and you are better off if you don't (when it comes time to get it back together!) Be careful to note that there are two wires attached to the retractor - one white, near the bottom, and one black, on the side. When you separate the body halves enough to see in the side, pull the black wire OFF. Then, you can get the cord retractor out far enough to pull off the white wire. DON'T FORGET TO REATTACH THESE WHEN YOU PUT IT BACK TOGETHER, or of course, the machine won't run.
STEP 6:
You've probably always known that the cord retractor in the 2100 is a total piece of crap. It's weak, and it notoriously jams if you pull the cord all the way out to its extreme position. I thought I could correct both problems by winding the spring a few turns tighter, but alas, it is already as tight as it can go. This will just be a lousy fact of life with the 2100. Put a piece of colored tape on the cord at the point when it's about 6 inches from being fully pulled out (if there isn't already a piece of tape there). And don't ever pull it out farther than that.
STEP 7:
Reassembly. Before you do anything else, take those two white plastic strips, and with pliers, either flatten or break off those two stupid teeth at the front end that make it so hard to slide the strips in and out. You'll thank me the next time you have to take the machine apart.
STEP 8:
Ease the cord retractor back in, making sure you get it BEHIND the plastic tabs at the top and bottom of the shell that hold it in place. First, just get it inside the body, ATTACH THE WHITE WIRE on the bottom, and THEN work the bottom half into place while you hold the body open. Then get the top half seated.
STEP 9:
Separate the body a little, and reach in the side to reattach the BLACK WIRE to the retractor.
STEP 10:
Separate the body a little near the back, and slip the back cover in, getting the two pins on top and two on the bottom inside the holes in the back cover.
STEP 11:
Spray some WD40 or other slippery lubricant onto the edges of those white strips. Slide them in from the front, until they are about 1 inch from the back, where the guide rails in the body taper down and disappear against the body.
STEP 12:
Slip the rubber cover over the back end of each white strip. Unless you have the plastic strip slid down just past where the body guiderails taper down, you won't be able to get the rubber end all the way on at the back.
STEP 13:
Push the rubber down all the way along the strip to the front, getting it seated over the top and bottom edges of the white plastic strip as you go. Pull a little near the front to get it over the front edge. NOW push the whole thing (rubber over white plastic strip) firmly toward the back until the front of it is flush with the front edge of the body.
Those strips don't pull out all that easily, so you'll never miss those teeth being gone. It's not like they are going to just "fall out" and let the machine come apart, and the next time you need to get in there, it will be much easier, because the strips will just pull out from the front with pliers.
That's it. You're done. I do so wish these idiots just made the thing come apart with 6 or 8 screws.
Max Magliaro
December 2005
 howtomendit.com for free repair help, information and advice.