Recent: Trayford close coupled toilet?

Mend KitchenAid Blenders/Mixers

Mend Kitchen Appliances, Blenders/Mixers
Find out how to mend it for free.

Ask Question
Mend Kitchen Appliances, Blenders/Mixers
Click here to mend KitchenAid blenders/mixers

Mend > Blenders/Mixers

Mend Kitchen Appliances, Blenders/Mixers

Replace Coupling of Kitchenaid 5 Speed Blender?

I need to replace the drive coupling on my Kitchenaid blender (model KSB5WH3) as some of the teeth have broken off; how do I get the old coupling off to replace it?

Pat
June 2004
San Antonio Plumbing Services

We are open 24 hours a day 7 days a week. We specialize in Plumbing Services and Repair, Toilet Plumbing Repairs, Sewer and Drain Cleaning, Water Heater Repairs, Plumbing Valve Repairs, Sink and Faucet Plumbing, Bathtub and Shower Plumbing, Water and Gas Leak Detection, Pipe and Hose Repair and Replacement and Disposal Repair. We service entire San Antonio County and our estimates are Free.

Call toll Free: 210 688-1463

http://www.sanantonioplumbingservices.com

San Antonio Plumbing Services

Mike Munoz
June 2011
Baltimore Appliance, AC and Heating Repair
We are open 24 hours a day 7 days a week. We provide Major Appliance Repair, Air Conditioning/ Heating Repair, Refrigerator Repair, Washer Repair, Dryer Repair, Oven Repair, Stove Repair, Dishwasher Repair and Disposal Repair. We operate in entire Baltimore and our service call is free with the repair.

Call our Local Number: 410 317-2025

http://www.baltimoremajorappliancerepair.com

Baltimore Appliance
Repair

Tony Bowen
June 2011
Appliance, Heating and AC Repair NYC

We are open 24 hours a day 7 days a week. We specialize in Major Appliance Repair, Air Conditioning/ Heating Repair, Washer Repair, Dryer Repair, Refrigerator Repair, Stove Repair, Oven Repair, Microwave Repair, Dishwasher Repair and Disposal Repair. We service entire NYC and our service call is free with the repair.
Call toll Free: 212 796-4981

http://www.nycmajorappliancerepair.com

NYC Appliance Repair

Greg Christopher
May 2011
Appliance, Heating and AC Repair San Antonio

We are open 24 hours a day 7 days a week. We specialize in Major Appliance Repair, Air Conditioning/ Heating Repair, Washer Repair, Dryer Repair, Refrigerator Repair, Stove Repair, Oven Repair, Microwave Repair, Dishwasher Repair and Disposal Repair. We service San Antonio County and our service call is free with the repair.
Call toll Free: 210 538-9875

http://www.appliancerepairsanantoniotx.com

San Antonio Appliance Repair

Bill Crosbi
April 2011
Los Angeles Appliance AC and Heating Repair Services
We are open 24 hours a day 7 days a week. We specialize in Major Appliance Repair Air Conditioning/ Heating Repair, Washer Repair, Dryer Repair, Refrigerator Repair, Stove Repair, Oven Repair, Dishwasher Repair and Disposal Repair. We service entire Los Angeles County and our service call is free with the repair.

Call toll Free: 800 215-3212

http://www.losangelescaappliancerepair.net

Los Angeles Appliance Repair Services

Gerald Burn
March 2011
How to Protect Your Appliances in a Storm
Severe weather can mean severe damage to your appliances, particularly if whipping winds, lightning, heavy snow or rain knocks out your power. When power is restored it can cause a surge—a sky-high spike of electrical juice from the power lines that fries the electrical wiring inside your appliances. To protect your major appliance during the next storm, be prepared using these easy-to-do tips.
If the power goes out,
1. Turn off and unplug your appliances. Particularly important is the furnace, water heater, sump pump, air conditioner, dryer, refrigerator, and anything with an electric motor. Power surges can ruin or shorten the life of any appliance that’s left plugged into an outlet.
NOTE: If your basement is flooded, don’t try to unplug any of the appliances stored down there.
1. If you have ample warning, turn your refrigerator and freezer to high and allow to cool before the storm arrives. Unplug the appliance when the storm hits.
2. Move milk, cheese, cold cuts and yogurt into the freezer, which will stay cold longer than the refrigerator. Be sure to keep the refrigerator and freezer doors closed as much as possible to prevent cold air from escaping. Throw a large blanket or comforter over the refrigerator to keep it insulated and save foods from spoiling.
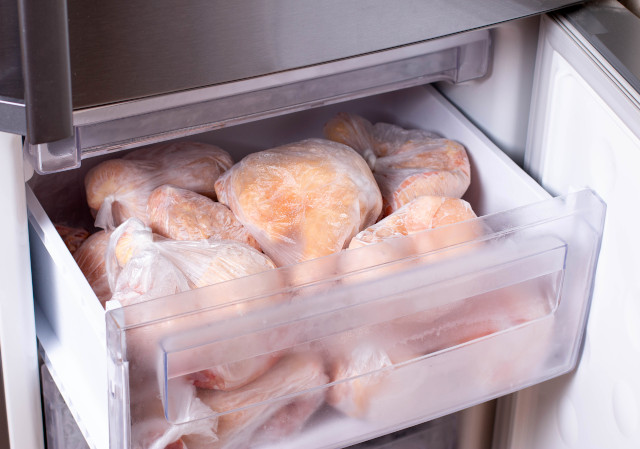
NOTE: A full freezer can keep meat frozen up to 48 hours. Fill a partially empty freezer with water bottles to take up any available space.
1. If it’s cold outside, shut off the valve that lets water into your home and open faucets slightly. The dripping water will keep your sink’s pipes from freezing if the power remains out for a long period of time. Turn off the emergency switch on your furnace and drain your boiler by opening the valve at the bottom. Also, open all radiator vents.
NOTE: The water in your hot water heater should stay warm for a few days without power. But if the power outage continues for a few days, and the temperature outside is below freezing, drain the hot water heater to avoid freezing.
1. If you have a generator, don’t plug more appliances into it than the generator can handle. Use only heavy-duty, outdoor power cords to connect the appliance to the generator.
When appliance power is restored,
1. Shut off appliances before turning off the generator.
2. Wait 15 minutes, then plug appliances in one by one and turn on.
3. Fill the boiler with water then restart.
4. Reset the refrigerator and freezer thermostats back to their normal setting.

Appliance, AC and Heating Repair Fort Lauderdale
We are open 24 hours a day 7 days a week. We provide Major Appliance Repair, Air Conditioning/ Heating Repair, Refrigerator Repair, Washer Repair, Dryer Repair, Oven Repair, Stove Repair, Dishwasher Repair and Disposal Repair. We operate in entire Fort Lauderdale and our service call is free with the repair.

Call us: 954 639-9467

http://www.appliancerepairservicefortlauderdale.com

http://www.appliancerepairservicefortlauderdale.com
March 2011
Miami Appliance and Air Conditioning Repair
We are open 24 hours a day 7 days a week. We provide Major Appliance Repair, Air Conditioning/ Heating Repair, Refrigerator Repair, Washer Repair, Dryer Repair, Oven Repair, Stove Repair, Dishwasher Repair and Disposal Repair. We operate in entire Miami and our service call is free with the repair.

Call us: 305 735-7259

http://www.miamiappliance.net

Miami Appliance
Repair

Jason Davis
March 2011
Appliance, AC and Heating Repair Spokane

We are open 24 hours a day 7 days a week. We provide Major Appliance Repair, Air Conditioning/Heating, Refrigerator Repair, Washer Repair, Dryer Repair, Oven Repair, Stove Repair, Dishwasher and Disposal Repair. We operate in entire Spokane and Coeur d’Alene and our service call is free with the repair.

Call us: 509 207-7138

http://www.spokanewaappliancerepair.com

Spokane Appliance
Repair

Jacob Martinez
February 2011
Appliance, AC and Heating Repair Boston

We are open 24 hours a day 7 days a week. We provide Major Appliance Repair, Air Conditioning/ Heating Repair, Refrigerator Repair, Washer Repair, Dryer Repair, Oven Repair, Stove Repair, Dishwasher Repair and Disposal Repair. We operate in entire Boston and our service call is free with the repair.
Call us: 800 215-2388

http://www.bostonmajorappliancerepair.com

Appliance
Repair Boston

Appliance, AC and Heating Repair Boston
January 2011
Denver Appliance, AC and Heating Repair
We are open 24 hours a day 7 days a week. We provide Major Appliance Repair, Air Conditioning/ Heating Repair, Refrigerator Repair, Washer Repair, Dryer Repair, Oven Repair, Stove Repair, Dishwasher Repair and Disposal Repair. We operate in entire Denver and our service call is free with the repair.

Call toll Free: 303 558-2688

http://www.denvermajorappliancerepair.com

Denver Appliance
Repair

Denver Appliance, AC and Heating Repair
December 2010
Brooklyn Appliance, Air Conditioning and Heating Repair
We are open 24 hours a day 7 days a week. We specialize in Major Appliance Repair Air Conditioning/ Heating Repair, Washer Repair, Dryer Repair, Refrigerator Repair, Stove Repair, Oven Repair, Dishwasher Repair and Disposal Repair. We service entire Brooklyn County and our service call is free with the repair.

Call toll Free: 800 224-1342

http://www.brooklynappliancerepairservice.com

Brooklyn Appliance
Repair

Hidalgo Cayman
September 2010
Washington DC Appliance, AC and Heating Repair
We are open 24 hours a day 7 days a week. We provide Major Appliance Repair, Air Conditioning/ Heating Repair, Refrigerator Repair, Washer Repair, Dryer Repair, Oven Repair, Stove Repair, Dishwasher Repair and Disposal Repair. We operate in entire Washington DC and our service call is free with the repair.

Call us: 800 242-4589

http://www.washingtondcappliancerepair.net

Washington DC Appliance
Repair

Washington DC Appliance, AC and Heating Repair
September 2010
1. Get the name of a local parts / repair place from KitchenAid.
2. Buy part #9704230 ("rubber clutch") for about $5.
3. Unplug the machine.
4. Open the blender case (screws are under the rubber feet).
5. Keep the shaft from turning by loosely sticking a screwdriver up into the works.
6. Remove the old broken rubber clutch by gripping it with a pair of pliers and unscrewing it CLOCKWISE.
7. Screw the new part in place, remove the screwdriver, and reassemble the unit.
I just used this procedure and it came off super easy.Thanks

Allen
May 2010
Remove the old coupling by holding a punch against one of the cleats and give the punch a sharp blow with a hammer. The old rubber coupling will loosen up. You don't have to hold the shaft. The coupling unscrews in the clockwise direction - so the punch is held against the slanted side of the cleat. I was suprised how easy it loosen up.

Ron S.
May 2010
I removed the rubber by placing a screwdriver just under the edges and prying gently several times (like opening a paint can). Then I turned the unit on its side, stuck a small screwdriver up through the bottom to hold the blades in place with my left hand, and inserted the a set of needle nose pliers into opposing holes on the aluminum disk (piece rubber was removed from)with my right hand. Apply pressure in opposite directions slowly, gently, but firmly, and the disk will break loose and you will be able to remove it from the screw base with your fingers.

Mrs. MacGyver
October 2009
gee some of you people go to a lot of trouble! I just followed directions - took my little cheapie screwdriver, lifted up on the coupling, and after a few lifts and it popped right off, and I'm a lady who has no talent for mechanical repairs.

Nancy
February 2009
Just read all the posts, and used the electrical pliers to hold the shaft. Mine were narrow enough to fit...some of the cheaper pliers have a big nut holding them together which keeps them from fitting in the small space. (I had 2 of the "Cheap" variety and one of the riveted style which fit perfectly) Took about 10 seconds to take off. (just remember it comes off backwards...took me most of the 10 seconds to realize I was turning it the wrong way!!) Thanks to everyone for the information.

Sherry
January 2009
I have the same problem and will work on getting the coupler off. My question is: where did you get the new one?

Cliff G
December 2008
After scouring several blogs and contemplating how much time, effort and/or money it may cost to use others' methods, I saw the entries suggesting the use of a long, thin screwdriver to hold the motor stationary while unscrewing the coupling. Kudos to human ingenuity and creativity! It worked like a charm in less than 20 seconds.

Mark L.
September 2008
I read what others have tried. The method that worked best for me was pealing the rubber away from the coupler exposing the aluminum portion then slowly prying it by using vise grips and wiggling it back and forth until it broke free off the shaft.

Wayne M.
September 2008
Pay attention to Peck from Dec 2005. The wire stripper worked perfectly with no fuss, no muss, no damage. Just use that naturally flat tool, hold the goofy nut and turn it clockwise and eureka!

Mark
March 2008
I pried it off as well. Using a towel or oven mitt between the screwdriver and the base (to give more leverage and prevent scratching) popped it right off. I was worried about breaking it until I read that the clutch is aluminum and the base steel. So I went for it and it was easy! Don't be afraid to pop that sucker off!

Gina
January 2008
The rubber coupling was a harder to release from our base, perhaps because our blender is older and used rigorously, but using the tips described here we did replace our damaged coupling. Unfortunately, we scratched the top of the base of our blender trying to replace it with the wrench, exposing the metal underneath. The small scratch amounts to a thin line of the white coating peeled off of the "ruffled" collar area that the blender sits on, so the scratch is covered by the jar and isn't seen. We plan to repair the scratch by going to an auto store and buying white touch up paint after sanding down the edges of the scratch. That should be water-proof, thus protecting the now bare metal from rust and grime. We bought our coupling at Goodman's on Amazon for $5.99. We bought two in order to save on shipping. It took about 5 days for delivery. It's good to have this blender up and running again.

Kitchen Aid Blender Mender
September 2007
Thanks for these posts; made the job painless & quick. Just to reiterate the highlights:
1. Get the ~$6+S/H replacement part from any of the places mentioned (we used www.partstap.com).
2. Insert skinny, long screwdriver into motor to keep blades from moving (if skinny enough, won't need to remove bottom). Insert far enough such that screwdriver blade is past the metal blades, not just the plastic fan blades.
3. Use pliers on old coupling and twist clockwise.
4. Keep screwdriver in place while you put new coupling on -- hand tightening is fine since it will tighten further as soon as you use it.
5. As long as you didn't accidentally gouge out the motor innards, you're all set.

John Reynolds
September 2007
It's really a piece of cake if you remember that the silly part is a left handed thread. Stick something in there to keep the motor from turning.... (don't use the plastic fan to hold the motor still), but stick something up in there to keep it from turning).... I actually unscrewed the old part by hand and I've had my blender for about 5 or 6 years.... new part screwed in easily and now I'm up and running.... total time elapsed... about 5 minutes. Thanks to all the other posts to get me rolling..... I thought I was doomed when I saw the part... I just said.. OH CR*P...... it's not gonna fit!!!!

Brad~~~~~~~

Brad~~~~~~~
August 2007
I just replaced mine using the 'pry that sucker off!' method. I just grabbed a big screwdriver, a towel, and worked my way around it prying it upward. As said above, the threading on the coupler is aluminum, and the shaft is steel, so it easily tore through the threads and left the shaft unharmed.

Brad
May 2007
Yes. this is exactly how I did it too. Stuck a screwdriver into the assembly to stop it from spinning then used a pair of vice grips to turn the knob clockwise. Worked like a charm.

Tim
April 2007
check the video
brute force is sometimes the simplest way
http://www.petermcinnes.com.au/changing%20the%20clutch.mov

K
March 2007
We had the same problem and used an Allen wrench to stop the shaft from turning. We stuck the wrench through the center of the bottom of the base (you don't have to take the base apart) and held the shaft stationary while we used a pair of channel lock pliers to turn the coupling clockwise to screw it off. It came right off and we screwed on the new coupling and then removed the Allen wrench.

Kelly
October 2006
I used a small flat wrench and held the drive shaft with it. I then unscrewed the coupling by turning it clockwise. Installed the new coupling by turning it counter clockwise. Done. I purchased 3 couplings for $7.99 on Amazon.com.

Stephanie
September 2006
Call Fort Worth Shaver they helped me do it over the phone. They also have kitchen aid parts. 817 335 9970

ashley
August 2006
I used a wire stripper and it took about 20 seconds with no cutting, bending, etc. The wire stripper is thin enough to get under the coupling. It worked like a charm.

Peck
December 2005
Okay, I followed much of the advice above, and was successful, though it took a bit of fiddling.

I purchased the replacement rubber clutch (# 9704230 - KitchenAid blender rubber clutch) from Marbeck.com ( http://www.marbeck.com/blenders_kitchenaid.html ).

After attempting to get an ignition wrench to fit the notches, I gave up. the 9/32 seemed to be the right size, but the Sears Craftsman ignition wrenches I had access to were too fat to fit in between the rubber clutch bottom and the top of the blender base. So I took a sharp knife and surgically dissected the rubber from the aluminum underneath it. Still the wrench would not fit in. So I took a pair of vise-grips and bent the aluminum wheel off the steel threads. This came off with a pop. Then I held on to the new rubber clutch and turned on the blender. Done!

stupidnickname
September 2005
I pried the old clutch off with a screwdriver in 2 minutes. The clutch core is aluminum, the shaft is steel. The aluminum bends without damaging the threads of the steel shaft. The new clutch went on easily.

I had to work at it though; it wasn't just one pull. Small pulls loosened it all the way around. I think it screwed off ultimately.

Remember: the threads are reversed: righty loosey, lefty tighty.

Tim
August 2005
My way:
Use pliers to remove the rubber clutch...twist... pull... work it off.
Using dikes grab the edges of the aluminum disk and bend upward all around.
Using simple wire strip tool (it is thin and will slide under the aluminium top and kinda grip the shaft. Squeeze the wire strip tool and using pliers , twist off the aluim cap. Use the wife for the gripping of the wire strip tool. The wire strip tool is the very cheapo kind sold at auto stores. It has a crimper on one end and the wire stripper inside...it about an 1/8th inch thick and will grab the alumin top bent up, just enough to let you get to the shaft and grip it. Have many ways can you spell ALUIMIHUPH?

Phil Townsend
July 2005
I ended up using the same method as Bob described. I originally tried holding the shaft with my ignition wrench, however it would not grab the shaft to keep it from turning. I tried both a 9/32 and a 5/16. I should have just taken the dang thing apart in the first place like I planned!

1. Get the name of a local parts / repair place from KitchenAid.
2. Buy part #9704230 ("rubber clutch") for about $5.
3. Unplug the machine.
4. Open the blender case (screws are under the rubber feet).
5. Keep the shaft from turning by loosely sticking a screwdriver up into the works.
6. Remove the old broken rubber clutch by gripping it with a pair of pliers and unscrewing it CLOCKWISE.
7. Screw the new part in place, remove the screwdriver, and reassemble the unit.

Brian
April 2005
The flat on my blender took a 9/32" ignition wrench, otherwise same as Bob's solution.

Gil
February 2005
I just replaced the coupling, part # 9704230 - took about 3 minutes. First I had a small, thin, 5/15 inch end wrench (commonly called an ignition wrench in auto supply stores) which I inserted between the bottom of the coupling and the blender top. The wrench fitted onto flats that are machined onto the blender drive shaft - look closely just under the bottom of the coupling. Then, while holding the small wrench I turned the coupling clockwise looking down on the top of the coupling by gripping it with channel-lock pliers (any pliers that will grip around the 1 and 5/16 inch diameter of the coupling will work). It turned off easily. I then screwed the new coupling on and used the small wrench to hold the shaft from turning and tightened the new coupling by turning it counterclockwise looking down on the top of the coupling. Voila! 3 minutes to do the whole job!

The appliance store ripped me off at $12.00 for the part but I saw them for less than $5.00 plus shipping on the Internet. The appliance store wanted $35.00 plus tax to do the whole job! The small wrench comes in sets for $1.00 sometimes at the dollar stores. At least I saved $23.00 on this three-minute job. Good luck.

Bob
January 2005
1. Get the name of a local parts / repair place from KitchenAid.
2. Buy part #9704230 ("rubber clutch") for about $5.
3. Unplug the machine.
4. Open the blender case (screws are under the rubber feet).
5. Keep the shaft from turning by loosely sticking a screwdriver up into the works.
6. Remove the old broken rubber clutch by gripping it with a pair of pliers and unscrewing it CLOCKWISE.
7. Screw the new part in place, remove the screwdriver, and reassemble the unit.

DoItYourself
December 2004
i figured it out. i took a pair of channel lock pliers & started bending the coupling up, much to my surprise it came off.

dave ski
December 2004
I wish I had an answer.
The same thing happened to us just today while blending a very wimpy mixture. It seems that the teeth on the "coupler" had become somewhat mushy prior to doing a self-destruct.
Since today is November 20-04, hopefully you "guys" might have a solution to the whole problem.
Just how DO you remove the old rubber gear, and where do you purchase a new one???
Thanks much for any info you might have.
If so inclined, please respond to glaucks1@tampabay.rr.com

Ingeborg
November 2004
Pat,

I'm in the same boat. You asked in June, did you get an answer?

Here's what I'm getting ready to do. I'll take a hack saw and cut the coupling back to the drive shaft, or close to it. It looks like it's all hard rubber and should cut back easy. Then I should be able to get a small, open face wrench or a good set of long needle nose, onto the shaft. The shaft is not round. It actually has a notch in it so a wrench can grab it. Once I'm tight on the shaft, I should be able to use my hand, or a plier/vice grips on the coupling and take it off clockwise (the opposite way of normal).

Putting the new coupling on should be easy. Rotate on counter clockwise (again, opposite of what is normal). I expect I may need to use a glove to hold it and just hit the ON button a little. Once in use, it will tighten on it's own, the harder the mix substrate is. Good luck. Let me know if you try it before me, or have found a better solution.

paul

paulreilly@sbcglobal.net
August 2004

Automatic Answer

While you wait for answers, we may have found some information which could help you.

Click here for Coupling Kitchenaid Blender

Mend Kitchen Appliances, Blenders/Mixers
Click here to mend KitchenAid blenders/mixers

How to mend ...

Find out how to mend just about anything howtomendit.com for free repair help, information and advice.
Mend Kitchen Appliances, Blenders/Mixers
Click here to mend KitchenAid blenders/mixers