Recent: Trayford close coupled toilet?

Mend Bosch Washing Machines

Mend Household Appliances, Washing Machines
Find out how to mend it for free.

Ask Question
Mend Household Appliances, Washing Machines
Mend repair fix Bosch washing machines

Mend > Washing Machines

Mend Household Appliances, Washing Machines

Bosch Washing machine replace rubber door seal?

I have removed the original seal by hand. Firstly the outside retainer and then the inside (held on by a detachable spring).

Trouble is I can't put it back together. Do I attach the spring (inside retainer) before inserting the Gasket into the washer?, or should this be attached as a last step?

Thanks for your help

John

John P
April 2008
my bosch Maxx 6 has no screws or removable bottom kick plate, it has two plastic dots at the door lock instead, I pushed one in and it did not like it !! can you help me get the front off to replace the seal....I cannot find other models that disassemble like mine on the internet, may thanks !!

Josie-Marie Ward
October 2014
Followed BB&DB guidance to change door seal of a bosch exxcel 1000. Exact model can be found on the inside top of the door. I bought a door seal from amazon for ÂŁ15 icl delivery. Haven't done a washing yet but it looks well fit.
Thanks to all.

VS
September 2013
hi all,
been attempting to fit a new door seal to a bosch classixx 1400 express, but failed to take note of the inner part of the seals position. Could any one tell me if it is placed behind the drum rim, as other types are, or is it just butted up to the drum? This serves me right for being distracted by the footie.

DEL
August 2013
Great tips. Thanks

tony
April 2012
Thanks for the help guys, just replaced my BOSCH
MAXX WFX246. Had given up but after seeing your site followed instruction and hay presto done in 40mins. Front panel must come off though and two sets of hands are an advantage.

SPANNER
June 2011
i couldnt take the front of the machine off as had no star shaped screwdriver. thought i was trying the impossible getting seal changed with the front still on but it only took me about 10 minutes, had no extra sets of hands and if i was doing it again it would only take me 5 minutes. very easy.

dave
December 2010
Tried several times to save sensible content - got the same error as this guy:
http://www.howtomendit.com/answers.php?id=169126

Here's the cut-down version:
Outer drum of WFO 2640AU/01 (Australia AU$80+$AU16 shipping) is sheet metal, not plastic. Otherwise, pretty much as everyone else described. I removed the door, but I not the front panel. 4 hands are a must to fit the inner spring.

Jim

jimstaffer
December 2010
This site ignored my answer with actual content, let's try this test...

jimstaffer
December 2010
I'm a qualified electrician, and never have "pretended" to be an appliance engineer. Wife had a moan about our machine door seal, she presented me with a new one this morning so out came the tool box. Took the old seal off.
Scratched my head for 10 mins then pulled the phone out and looked on here, had it back together in under 10 minutes.
Excellent advice from everyone but gotta admit I just followed. BB & DB advice in reverse.... Thank you all

Devon boy
November 2010
you do not have to remove concrete block, if it is too tight simply loosen bolts and slide block away from tub a bit then retighten bolts

washdryman
November 2010
Great advice. Just completed job on a Bosch Classixx 1100. I would add..

1) Remove the top panel (2 screws at rear) - allows far greater visbility.
2) No need to disconnet door lock wires - there is enough slack in the wires to allow front panel to swing to one side whilst still connected.
3) Unlike some others - did not have to take off concrete weight - it's a bit fiddly, but you can fit inner seal with weight still on.


No help, just me, job took 40 mins! Seal from internet ÂŁ10! Done.

Bfella
October 2010
First class advice - straight forward once you follow the steps - def easier with two people for the trickier bits!!

SDH
October 2010
great helpful instructions. the only thing i would add is that on some models it is easier to fit the new seal after removing the concrete block which is just held on with three bolts. This gives you much better access to refit the seal at the bottom. Whole job took about an hour, slightly fiddly, but saves a fortune.

diana
September 2010
How easy was that after taking the door, control panel, main front panel and concrete weight .. there's no way I would have been able to get it on without taking these steps .. the motivation came from taking the instructions to drink beer and smoke sneeky cigarettes!!
Cheers Boys!

Tom
September 2010
Great advice, especially from BB & DB. However I found a few things slightly different on my machine (Bosch Classixx 1200 Express) so thought I would post it here.

I removed outer spring and front panel as described by others, but found the concrete ring around the drum was too close to allow good access to the inner spring. It needs to come off to make this easier.

To do this, remove the control panel held in by a small screw on right (be careful not to pull the wires - I tied it up with string to support it while I did the rest) and the metal strip below it. Then remove the three 10mm bolts holding the concrete ring retaining clips and carefully lift out the ring. You can now remove the inner spring and replace the boot as described.

The whole job was quite straightforward and cost me ÂŁ15 instead of the ÂŁ80 I was quoted to get someone in to do it.

DL
September 2010
Excellent tips particularly BB&DH and Sam-the-Man. Follow these and the job really isn't that difficult. You will need a Torx t20 screwdriver. CAUTION - be careful when cleaning the rims of the drum the edges are razor sharp - two sliced fingers to prove it!

Vic
August 2010
Hi,
Just replaced boot on Bosch Maxx WFL 2061 as previously mentioned front panel removal a must
1) Remove bottom panel taking out filter plug one screw and slide to the right to remove
2) Top control panel 3 screws from feeder tray area,1 screw on right side of the main side panel
3)pop off control panel with screw driver at top edge( it clips in)
4) Door off 2 screws
5)Top of machine 2 screws at the rear top
6) Front panel 2 screws at the bottom (have to lay on the floor to locate)
7) Front panel itself is held in place with 4 palstic grommits two either side at the bottom pop outs (locate with a torch use big screw driver) two grommits at the top each side which slide down and out
Rest is easy as you can access the rims all around to fit on the boot two pair of hands is good

Sam-the-man
August 2010
Thank you all, especially BB & DB for all the useful information. We managed to DIY it and save several pounds in the bargain! The following website provides a great service for spares and useful step-by-step videos:

http://www.espares.co.uk/Default.aspx

If you place an order with them my referral code is V41JG87C. Thanks

Criosdean
August 2010
I changed the seal in 30mins on a Siemens XL1000 "Extraclasse" machine, 5 minutes was with the able support of my girlfriend.

I would add, along with other voices, that the key to success is removing the front panel in order to gain complete access to the washer drum. It is a must.

There are three mounting screws in total. Two are located at the footer of the machine once you remove the plastic filter fold and manifold (there is an additional apparent small screw behind the filter fold flap that obviously also needs to be removed). The third front panel mounting screw is located at the bottom right of the soap drawer.

You're now ready to pull the front panel away from the machine - beware not to pull too dramatically, as there is wiring that remains tethered to the door lock and machine body.

James
July 2010
worked a treat!!

Steve Harding
July 2010
what a fool i was, after trying to replace the rubber seal back unto the white inner drum, i realised that i was attemting to replace the seal the wrong way round, i was trying to put the outer door seal onto the inner door seal, how i laughed with bleeding hands the foolishment of my actions. What alerted me to my stuped act was that the bottom seal drain holes where facing out towards the door and not in towards the washing drum , once i realised my actions it took 10 minutes to complete job, not the 2 hours prior , so the moral of my ditte is make sure you have seal correct way around and its a easy job. personnal thanks go to bb and db great post guys. ps my machine was bosch exxcel 1200

T argent ,england,
July 2010
Thanks to Brian (BB/DB), possibility the most useful piece of information I've ever had on the internet! Worked a dream. My model is Bosch Maxx WFL 2260.

Dave
June 2010
While you have the seal off take the opportunity to scrub out the gunk on the inside edge of the drum. I used Viakal and an old toothbrush. No more smelly washing!

Phil R
June 2010
Thank you to all who provided information. We took just 30 minutes to complete the task. Here are our comments/suggestions on dealing with a Bosch Exxcel 1200 Express machine. I suspect most Bosch washers are similar. You will need the following:

a. Star-shaped screwdriver (NOT cross/philips type);
b. Normal (flat) screwdriver;
c. Pliers.

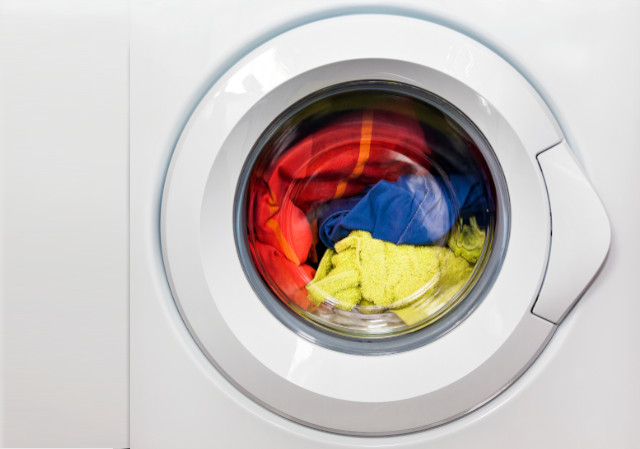
Obviously you will need a new door seal (boot) - available from Bosch. They have a very efficient mail-order system. Cost at June 2010 was ~ÂŁ40.

1. Unplug machine from electricity;
2. Remove soap dispense tray;
3. Remove fluff filter door (bottom right of front of machine);
4. Remove retaining screws holding on plastic skirt at bottom front of machine;
5. Carefully remove wire/spring retainer, noting position of spring (at 8 O'Clock position) - you should NOT need a replacement and you do not need to separate the spring from the wire;
6. Ease old seal (boot) from front panel;
7. Remove retaining screws(three) at soap drawer opening, plus those at bottom (revealed after plastic skirt removal);
8. Slide front panel off (no need to remove door) - take care to unplug cable connection to door lock mechanism;
9. Remove rear spring on seal(boot) with drum, noting it connects at the top;
10. Disconnect the water inlet pipe from old seal (boot) - located at the 11 O'Clock position - use pliers to ease tension on retaining metal 'coil' - you should not need a replacement - do not try to pry it open;
11. Remove old seal (boot) and clean the revealed white plastic strip on the drum.

Fitting is simply the reverse process. The only 'tricky' parts are getting the tension on the inner spring retainer and the wire-spring (outer) retainer. This is where an extra pair of hands is very helpful. With the inner spring, we found that if one person held one end at the 12 O'Clock position, the other person could fit it whilst applying tension and wrapping it around the seal (boot) to meet the other end. Fitting the wire-spring outer retainer is a bit like fitting a tyre back on a wheel rim - use spoons to help with the fitting.

Honestly, it is very easy. If we got paid the going rate we would be rich men......

BB & DB

Brian
June 2010
Thank you so much for all this wonderful information. I have just finished replacing the door seal on an old WFK5730 Model and although some of the places for screws etc were slightly different I managed it without having to obtain special tools or get in any sort of engineer (only some help with the springs from my wife!!). If you chaps did not bother to assist on sites like this then we would be a lot worse off. Thanks again.

Howard M
May 2010
brilliant advice, I managed to blag my son into changing the seal took very little time once we followed Blog , most people seemed to think it was impossible to do, saved loads of money

Maggie
April 2010
Thank You so much Guy's for sharing your experiences ,if You had kept your knowledge to yourselves I would not have been able to complete this task today.Thank God for the internet.I purchased a replacement rubber door seal via a websit,it arrived via Royal Mail.
Search engine on internet,found this site.Read instructions.
Thank You for recommending removing front panel,first snag,screwdriver,I have star and flat.These new screw heads are alien.Walk down town to purchase a new design of driver,Halfords,cheap ÂŁ10 pack of multipile driver heads.
Home,Wife removes soap powder tray,so I can gain access to panel screws.
I will not cover the material already posted on here.Just my tips.
Pulling off the springs,first spring pull hard as already mentioned.Second spring,2 pliers onto spring to pull off.
Replacing technique,to get rubber onto white drum,Baby oil to lubricate,smeared baby oil on with tissue.
Replacing
Inner(nearest to drum) spring,first spring to be reset,2 secure spring at bottom of the loop in the groove first,now tension at top of loop,(Pulling two ends of spring to meet up)the tough step,I used 2 flat (Old fashioned )screw drivers between rubber and spring acting as levers.Slid the taught spring over screw driver levers into slot.

Bwanatickey
March 2010
Good instructions guys. Front panel deffo off on the WFL2063 then it's a dawdle. Prize of the outer retaining ring then pull the seal off its recess.Three screws inside top drawer, one screw locating the bottom panel then slide to right to remove, two further screws locating the bottom of the front panel,up top and the wee countersunk screw round the corner at top right which allows the controil to move a bit to ease the removal of the front panel. pull off the plug for the door switch and remove trunking and/or wires from the panel. There is a spring holding the inner part of the seal so prise that away and the seal will then pull off it's inner lip. Clean round the lip before you fit the new seal and refitting is a reversal of removal. Total time start to finish was 30minutes and that was a first for me so the job isn't difficult.Tools reqired are a couple of Torx screwdrivers and strong fingers.

Jimmy Simpson
February 2010
Hi,
Thanks for all the advice given. Just finished changing the seal. My advice is to take the front of the machine off - three screws around the soap dispenser, two on the side and one at the bottom (inside the drain door) - then its simple to fit the seal to the drum. To fit the spring outer ring you will need an extra pair of hands or lots of patience. I got knowhere for 2 hours, then decided to take the front panel off and the wife helped with the spring - all done 10 mins!! Hotpoints are much easier!

John
January 2010
Bosch Maxx5 1400 - having just completed this job it is quite straight forward, read all the other writers tips before starting...
The tricky bit is connecting the rubber seal to the White plastic drum, which you should do along with it's spring before you connect the seal to the outer panel. There's a real knack to this but it can be done with a little practice with one hand by pushing the seal onto the drum with your thumb then easing the rubber up over the rim again with your thumb, working your way round the drum - I used a little fluid to lubricate the rubber which helped with the inner seal but made the outer seal keep slipping off when I tried to get the spring on, so I had to dry it before successfully completing the task.
Connecting the springs (Inner & Outer) around the gasket/rubber seal is so much easier with an extra pair of hands.
Do take Photos as advised by a previous writer - they are invaluable! I took one at each step of removing the old gasket/seal showing how it was connected... and did have to refer to two of them when putting the new gasket/seal on.
God Luck...

KennyBoy
October 2009
I've just seen the previous question about how to get the back spring off. That's easy. Just pull the old seal off the plastic drum and the spring will come off with it. You may have to exert some force, but there's no risk that you'll damage anything. Even if you split the old seal (which you're unlikely to) it doesn't matter because you're going to throw it away!

Geoff
October 2009
I have just watched a professional do this job on an Exxcel Express 1200 WFO2465GB having failed (but see below) to do the job myself. First of all, it's possible to fit a new seal without takng the front panel off, but you're crazy to try. The panel comes off easily enough; all the screws are on the front of the machine, and you don't need to turn it on its side or anything. There's a small pipe that needs to be unclipped/refitted to the seal on this model, just to the left of centre at the top. The small drain holes in the seal should be centred at the bottom. Follow the instructions about fitting the seal to the white plastic drum in the previous answer, but don't fall into the trap I fell into and think that the lip of the seal needs to go into the gap between the plastic drum and the spinning metal drum. Unlike some other washing machines, on this model the lip of the seal lies INSIDE the inner drum. My advice is to take careful note of how the old seal fits before you take it off. Take a photo if you like; I wish I had!

After that it's easy; just follow the previous instructions. Overall, I'd rate this as quite an easy job once you have made the sensible decision to remove the front panel, and have understood where the lip of the seal is supposed to lie. As I've explained, I actually managed to do the hard part without taking the front panel off, and nearly broke my fingers in the process. After that, I misunderstood what I had to do (or rather not to do), gave up the struggle, and called a local firm to complete the job.

Geoff
October 2009
how do u get the back spring off?

karl
September 2009
my bosch classixx 1200 spin does not have the clearance around the drum to get the back retainer on. the concrete is only half inch away from the drum outer ! just cant get at it.

steve
March 2009
not easy job . never could put it back. damn!

yoyo
November 2008
Hi John,
I just replaced the door seal on a Bosch WFL246KGB/04. It took 40mins flat, including time for two Buds and a sneaky fag! Assuming yours is the same build style as above, here goes......
Guess you have already removed the door and the front panel (after removing the outer gasket spring clip)? The inner spring goes on, after you fit the gasket. Ease on the gasket, around the plastic outer drum, ensuring that the lip of the gasket locates fully with the drum recess. Before fitting, take a damp cloth to the outer drum lip and wipe all the gunk off. Get right inside the gap between the plastic outer and stainless steel inner, 'cos any residue on the sealing edge is going to make the seal leak. Some recommend using some soft soap or other lubricant before fitting the gasket, but it's really not necessary. Make sure the gasket goes on as it should. The moulded 'dent' in the inner gasket face should be at 6 o'clock. Once you're happy that the gasket is fully engaged on the plastic outer drum, you replace the spring in the gasket recess. It's best to keep the ends of the spring at 12 o'clock and then stretch the spring out, working around the circumference of the gasket. Three hands would be good here, but if you are on your 'Jacks', a bit of perseverance pays off (here's where the Buds come in!). Once you have that on, re-fit the front panel (At this stage, remember to re-connect the door catch sensor plug, on to the door catch). Then, after wiping around the recess in the front panel, ease on the outer gasket, into the pressed steel profile in the front panel. As with the inner gasket lip, it's obvious when it goes on right, as you can see it 'seats' properly. Then re-fit the outer spring retaining ring, which you may need a small, blunt, flat bladed screwdriver to lever the solid wire ring into the recess. Then, replace the door, replace the bottom panel and BINGO, seventy quid saved and time for a self-congratulatory Bud and a fag (optional!). Hope this helps. TTFN :-)

Richard L
April 2008
Mend Household Appliances, Washing Machines
Mend repair fix Bosch washing machines

How to mend ...

Find out how to mend just about anything howtomendit.com for free repair help, information and advice.
Mend Household Appliances, Washing Machines
Mend repair fix Bosch washing machines