Recent: Trying to find lawn mower part- Power Devil PDG4037R?

Mend Makita Drills

Mend Power Tools, Drills
Find out how to mend it for free.

Ask Question
Mend Power Tools, Drills
Click here to mend Makita drills

Mend > Drills

Mend Power Tools, Drills

How to mend cordless drill battery?

My Makita drill is cordless and the battery will charge ok but runs low very fast. I was told there is fix for this. Some guys sell the info on ebay. Any help would be nice. I don't use the drill very often.

John Clemens
January 2008
Many appliances, tools, toys and electronics run on batteries, making them more portable than ever. Rechargeable batteries have become a popular power option as they last longer and are considered "greener" than other battery options. But eventually even rechargeable batteries fail to hold their charge. Rechargeable batteries can be fixed by zapping them with a high volt of electricity, a concept which is similar to that of jumping a car battery.


Gather your dead rechargeable batteries. Check their power levels on a battery tester or a digital multimeter to make sure they have been fully discharged.

Use a 12-volt 5-amp AC/DC charger to repair rechargeable batteries. Using the appropriate safety precautions (see Warnings), place the black charger clamp on the negative side of the battery.

Lightly tap the positive end of the battery once or twice with the red clamp on the 12-volt charger. Sparks may shoot out of the end of the battery.

After tapping the rechargeable battery, place both clamps on the appropriate positive and negative ends of the battery and hold for a maximum of three seconds.

Test the charge on the rechargeable battery once again with a battery tester or digital multimeter. Repeat the process until the battery is fully charged.

Read more at http://www.drillbattery.co.uk

Kelly Rudd
November 2013
A cordless drill's operation is dependent on its battery. If you've ever tried to run a cordless drill with a low battery, you know that the drill's performance suffers. If the cordless drill's battery is dead, you might think the only option is throwing the battery away. However, there is a chance that you can repair the battery.

Disassemble the battery case using a Phillips or flat-head screwdriver. Take the battery cell bundle and any springs or other parts out of the plastic casing. Set everything aside but the battery bundle.

Create a drawing of the battery bundle's connections. Carefully disassemble the battery bundle by cutting through the tape holding it together. Do not disconnect any of the cells from one another. Diagram which cells are connected to which other cells and how they are connected. Once you finish your repair, you will need the diagram to know how to reassemble the battery cells.

Use the volt meter to test each battery. Place the red probe against the positive side of the battery cell and the black probe against the negative side of the battery cell. Identify which battery cell or cells are no longer holding a charge.

Cut the connections between the bad battery cells and any connected battery cells using the wire cutters. Set the bad battery cells aside for disposal.

Position the new battery cells in the correct places. Solder the connections on the battery cells to reconnect them to the neighboring battery cells. The battery strap at the positive and negative end of the new battery cell should be soldered just as the previous battery cell was.

Reassemble the battery pack, using the paper tape to hold the batteries in the correct arrangement. Reinsert the battery bundle into the battery compartment, replacing any additional springs or materials in their correct places. Screw the compartment back together.

Fully charge the battery pack before using the drill again.

http://www.drill-batteries.com

Chris Belly
February 2013
Fixing rechargeable drill batteries saves you money and a trip to your local electronics shop. The average cost of a new battery pack is $80, and a new drill costs even more. You can pocket this extra money if you can fix the drill batteries yourself. Results may not be guaranteed and it can cost you some time, but it is definitely worth a try.

Charge the battery for a few hours.

Check the voltage of the battery using the multimeter.

Set the voltage of DC power supply to 31 volts by turning the voltage up and using the multimeter to measure and reach the desired setting.

Lay the dead battery on the work table and check the polarity. The plastic is marked with a (+) and a (-) sign.

Link the MIG welder to the battery based on polarity. Attach the negative end clip of the welder to the (-) pole of the battery.

Zap the (+) pole of the battery using the positive lead of the welder. Repeat four to five times.

Attach the battery to the drill. Turn the drill on to test it.

http://www.drill-battery.com.au

David James
February 2013
To for http://www.batterieschargerstore.co.uk

John
April 2012
There are several steps you can take to insure that you get maximum performance from your cordless power tools batteries:

Breaking In New Batteries: new cordless drill batteries come in a discharged condition and must be fully charged before use. It is recommended that you fully charge and discharge your new battery two to four times to allow it to reach its maximum rated capacity.

Preventing the Memory Effect: Keep your power tools battery healthy by fully charging and then fully discharging it at least once every two to three weeks. Exceptions to the rule are Li-ion batteries which do not suffer from the memory effect.

batteryfast.co.uk
January 2011
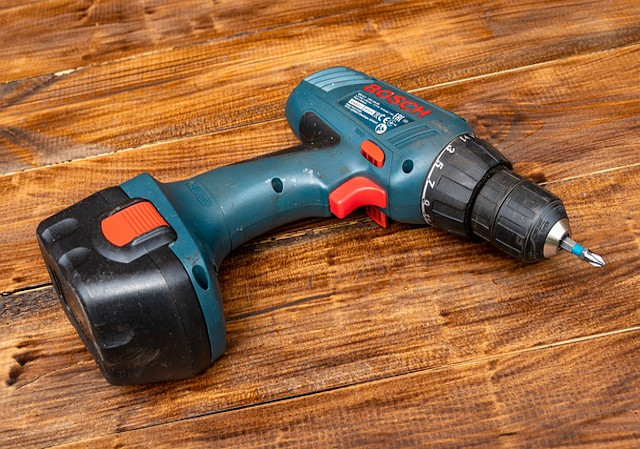
Although your cordless drill battery no longer holds a charge, there may still be some life left in it. An 18-volt cordless drill battery pack can be revived using a process similar to jump-starting a dead car battery. This process should only be performed on Nickel Cadmium (Nicad) and Nickel Metal Hydride (NiMH) battery packs.

Test your dead cordless drill battery pack using the volt meter to verify which lead in your battery case is negative and which is positive. Clearly mark which point is positive and which is negative on the battery case to ease the difficulty of later reassembly.

Use a small screwdriver to open the drill battery case. Watch out for the spring inside of the case because it tends to pop out and can easily get lost. Save the screws and spring by placing them in a small container.

Lift off the top of the cordless drill battery case to expose the inner battery cells. These cells will look like a grouping of C batteries that are joined together in one link.

Remove the battery cells from within the bottom of the drill casing. These will come out as one unit as they are banded or shrink-wrapped together.

Locate the point where the wires run from the terminal piece down through the silver cardboard insulator. The terminal piece should be black or silver and located on top of the silver cardboard insulation, with the batteries beneath the cardboard. Mark the silver cardboard insulator at the exact point where the wires pass through the silver cardboard insulation. Again, this will make it easier to reassemble.

Release the terminal piece from the silver cardboard insulation using needle-nose pliers. Take care not to let the terminal wires touch or cross during this process as you are at risk for electrical shock or even an explosion. Set the terminal piece aside along with the battery case screws and spring.

Note the exposed metal band on the side of the battery pack. It is important to insulate this band with electrical tape prior to starting the process. This metal piece will be hot during the reconditioning process and insulating it with electrical tape will protect you from injury.

Remove the silver insulation piece that covers the top of the rechargeable battery cells. Place this piece aside to be used in reassembly.

Remove any plastic covering from the top section of the battery pack so you can access both the the top and bottom of the rechargeable battery leads.

Turn on the volt meter and set it to a reading of two volts. Check each individual battery cell and mark each battery cell that gives a reading of zero or negative. These will be the cells that will need to be reconditioned.

Prepare your external 12-volt power source, including alligator clamps, for the reconditioning process. Protect your hands, eyes and skin with protective clothing and safety gear during this potentially hazardous process.

Learn to revive your drill battery. Locate the positive and negative ends of the first battery to be reconditioned. The positive end will be raised and the negative ends will be flat.

From the 12-volt source, hold the black alligator clamp to the negative end of the battery and the red alligator clamp to the positive end for two seconds.

Release the clamps and use a battery test to see if the battery has been fully charged. Repeat the process if necessary. The rechargeable battery cell can be zapped up to 10 times. Continue reconditioning the remaining batteries.

Reassemble the battery pack.

post by http://www.batteryexpress.org.uk/power-tools-batteries.htm

drill battery batteryexpress.org.uk
September 2010
I hate it when my cordless drill gives up in the middle of a job. It seems that the supplied battery packs just don't cut it. So I opened up the battery pack and replaced the NiCads with much longer lasting NiMH batteries. Now I get a much longer use between charges.

New replacement Cordless drill battery http://www.ebattery.com.au/Power-Tools-batteries.html

ebatterycomau
August 2010
How to Charge a Battery for a Cordless Drill

Put a new cordless drill battery on its charger for a minimum of 18 hours before using it for the first time

Use the full capacity of the battery between charging for best results. Nearly all drill battery packs are comprised of either NiCd (Nickel Cadmium) or NiMH (Nickel Metal Hydride) cells, and both respond well to this method, which is the opposite of an automobile-type sealed lead battery. Simply put, as a rule of thumb, you should discharge completely and charge completely.

Do not leave a NiCd battery pack on its charger for more than 30 hours. They also will develop a memory that shortens the life between charges if you use it briefly and put it on the charger for short, "quick" charges. The full discharge and charge method is especially important for NiCd batteries.

Discharge a battery pack fully before storing it. Store in cool, dry place of moderate temperature so that it will respond well when it comes time to recharge it.
http://www.battery-company.com.au/power-tools-battery.php/dewalt_6.htm

batterycompay
July 2010
it is quiet easy to do but there's a whole book load of theory behind it, however regardless of that here it goes....
obviously you will need open out the battery. before opening, do top up your batteries for 5 mins from total exhaustion (fully dead/drained battery - charge or 5 mins). once open from its casing, make sure to keep them isolated from each other avoiding a short. measure the voltage across each cell. provide a exhausting load and the measure the voltage across each battery. let the battery drain with the load and quickly measure the voltage drop across each. at this point in time you should get at least one battery reading full voltage on its terminals whereas majority would be totally dead or slowly gaining pd again. the cell/s which regain voltage instantly after exhaustion are known to have a huge increase in their internal resistance and thus ....blah blah blah .....happens causing the other cells to discharge to this battery during a closed circuit/ current flow.

how to fix it.....pull out the bugger/s and replace. normally one cell is 1.2 volts. normally only one cell will be causing the problem however i have had one case where i had three cells bad. should you be unsuccessful in one attempt.....do not worry.....more buggers are probably hiding in the pack. they show up from the worst to the least bad ones. repeat the procedure several times to get things right.

Word of warning:
do not mix different batteries together...if you have NiMH battery pack, use NiMH cell. do not mix NiCAD and NiMH and so on. annother theory lays supporting this statement. in simple they have different charging/ discharging rate. C10 to C50 range, different operating temperature and thus performance of one cell would differ from the rest if mixed cells are being used.


i do not wish to disrespect anyone's practical experiments or experiences but to my knowledge a welder normally works at low voltage high current which will merely destroy the battery pack if not cautious about this. the act does work but the effect doesn't last as much.
batteries don't have memory...they work on chemical reactions. improper cycle of the chemical reactions will lead to breakdown in chemical compounds in within the battery thus .....higher internal resistance...blah blah blah blah....better way to say then the memory line in the last post. sorry no offense to those who have posted here.

credits - prof kumar


cheers...hope the info helps...

mr. kumar
March 2010
you neeed a wealder and you turn the wealder on then put the + side to the + side on the battery and do the same to the - side it will zap the batterys back to life and yes it dose work i tryed it p.s. dont hold it there more then about 5 sec.

c.t.j.
March 2010
before you go to the trouble of opening the batteries try freezing them (at least four hours) then charging them as they thore - the charger will decide when its ready . This may well remove the memory effect and makita units seam to respond well to this trick.
happy charging !

toby
October 2008
I replaced my ni-cad batteries with MiOH units (they are the same voltage). This was on a Delta 14.4V drill. I used the same charger unit and it has worked well. The old batteries were 1.9 amp-hour. the new ones are 3.5 amp-hour so almost twice as much power. I used a 140 watt soldering iron (all I had) which is marginal for the job. I have since found out you can get a heavier iron at a leaded glass supply. Study how to position the batteries carefully and do not let the tabs short out in the process. Good luck.

Fred
March 2008
First, open up your battery. Check each individual cell with a multimeter. If any are short circuit they will need replacing. Most are standard size and can be replaced, though some soldering skill may be required.
If none are short circuit, then the battery is suffering from the memory effect. Rejuvinating involves running the complete battery flat then recharging. Then run it flat again. This will need to be done several times.
Note: Ni-Cad batteries are the most common type to suffer from the memory effect. It is caused by "topping up" - people charging the battery without allowing it to drain completely first.

Colin
January 2008

Automatic Answer

While you wait for answers, we may have found some information which could help you.

Click here for Cordless Drill Battery

Mend Power Tools, Drills
Click here to mend Makita drills

How to mend ...

Find out how to mend just about anything howtomendit.com for free repair help, information and advice.
Mend Power Tools, Drills
Click here to mend Makita drills