Here are a couple solutions:
How To Recalibrate DVD Player
Summary:
For those that are having the skiping up and unreadable disk problems try the following calabration. I did it last night and now my DVD's are much clearer and I'm hoping the skiping problem is gone.
For those that have the lip sync problem Sony should cover this for no charge, you just need to push them a little. This is a firmware update, have a look at the other posts at this web site to find the firmware revision that you need.
HOW TO PERFORM THE CALIBRATION
Make sure that the DVD player is turned OFF and in the stand-by mode with the little red LED glowing above the on/off button.
To enter the service mode/test mode, press Title, Clear, and Power on the remote.
This will produce the following menu:
Test Mode Menu
0. Syscon Diagnosis
1. Drive Auto Adjustment
2. Drive Manual Operation
3. Mecha Aging
4. Emergency History
5. Version Information
6. Video Level Adjustment
Exit: POWER Key
What each item does;
Syscon Diagnosis = Leave this for service technicians.
Drive Auto Adjustment = Automatically calibrates DVDs and CDs.
Drive Manual Operation = Manually calibrates DVDs and CDs with prompts for permission to skip, execute and/or proceed after each adjustment is made or skipped. Offers a fascinating look at all of the many adjustments made, but this method is time consuming.
Mecha Aging = Allows auto repeat mode for testing purposes.
Emergency History = Shows the number of hours on your machine.
Version Information = Shows firmware version.
Video Level Adjustment = Test pattern.
Press #1 (Drive Auto Adjustment) on the remote and the following menu will appear:
Drive Auto Adjustment
0. All
1. DVD-SL
2. CD
3. DVD-DL
4. SACD
Exit: RETURN
Press #1 (DVD-SL) on the remote and insert a Single Layer DVD when the drawer opens.
Even though you may be interested in calibrating only a dual-layer DVD, do not skip the single-layer calibration procedure. For some reason, the player prefers to first calibrate a single-layer DVD before proceeding to a dual-layer disc. Error messages may result if the single-layer calibration procedure is not performed first.
Press the enter key and the machine will begin to calibrate all of the playback features. When calibration is completed, follow the onscreen instructions to return to the above menu.
When the Drive Auto Adjustment menu returns, press #3 (DVD-DL) on the remote and insert a Dual Layer DVD when the drawer opens. Follow the instructions as noted above.
When calibration is completed, follow the onscreen instructions to exit from the Test Mode Menu. Now you can turn the player back on and try your dual layer discs to see if the layer change has improved.
If you have any concerns about trying this service mode calibration, leave it for an authorized service facility
Other solutions:
1. To reach this test menu on a DAV-S300, press and hold the "STOP" and "Muting" button on your DVD Player (not remote) and turn the volume nob clockwise about 180 degrees. You will see a flicker. A blue test screen will appear, allowing you to calibrate your DVD. Please note that if you have no technical experience, messing around in this menu can cause serious damage to your DVD. The calibration option will be under: option 1, Disc Drive Auto Adjustment (or words to that effect). Be sure to calibrate a single-layer disc first, then dual layer -- you need to calibrate both types. Good luck.
In order for the STOP + MUTE + VOLUME sequence to work, your player must be ON, but have no disc present. You need to empty the tray, power off the S300 and power it back on. Wait until the INSERT DISC/NO DISC prompt appears. Then try the SMV sequence. And you must use the buttons on the unit, NOT on the remote, to enter the service menu. Once in the menu, use your remote to select the auto calibration menu and go from there.
2. This will fix the C 13:00 problem on any Sony DVD player.
With the machine turned off on standby, press the following 3 buttons
on the handset, in order: TITLE CLEAR POWER. The Diagnostic Start menu will come up on the TV. Select the appropriate button number for "auto adjust". The
machine basically does it all. It asks you to select either a single
layer or double layer disc (whatever your offending disc is.) Ejects
the tray, asks you to put your disc in and then calibrates it. (It's
over in about half a second... painless) Just follow the prompts on the screen
3. [ SONY DVD FIX ]
Model #: Sony DVP S560D
Bought: Summer 2000
Problems Started: Spring 2002
Fixed: Spring 2002
Problems Started Again: Fall 2002
Equipment Used
· 15 watt Soldering Iron (Radio Shack Part # 64-2051, $10) · Silver-Bearing Solder, .022 diameter (64-013 B, $3) · Phillips Head Screwdriver - medium sized · Needle-nose pliers · Compressed air can for cleaning electronic/computer parts. ($5, comp section of Best Buy)
Disclaimer: I am very inexperienced with electronics repair. I went into this fix with the attitude that I had a doorstop, and that I was OK if I killed it in the process. This is definitely not an 'official' fix, just how I did it.
That being said...
It seems that I, along with many other people, have learned that the SONY name doesn't mean any extra degree of quality. (To put it politely) Several models of DVD players stop working after 1-1.5 yrs because one tiny fuse was too weak to handle the current going through it causing the infamous "NO DISC"/"C:13:00" dirty disc error message. Below is how I fixed mine. It has been working for about 4 weeks now after the fix. The fix involves bypassing a fuse.
Notes
· My player has stopped working again. I have given up and have bought a replacement player.
· My terminology is not by any means correct.
· Be careful with screwdrivers, I thought I almost killed my DVD player a couple times when it slipped as I was screwing something in.
· You will have to remove a couple of ribbon wires from their place. To put them back in, there sometimes is a plastic structure that you insert them into, and you have to pull up on part of that, insert the end of the ribbon, then push the plastic back down.
· I got the basics of this fix from the boards at audioreview.com. The bottom of this page has helpful comments from others, and much of the steps below are from other people.
· A more technical repair page can be found at: http://www.iwaynet.net/~nesda/DVDEZ.pdf and http://www.iwaynet.net/~nesda/SonyDVD.html
The Fix
1. Remove the cover of the unit.
There are 5 black screws, two on each side, one on the back.
2. Remove the front panel.
You will have to take out the disc tray. You can plug in the unit, hit the eject button, then unplug it. When it is ejected, you have to push down 2 tabs on the top of the tray to release it. The green ribbon-cable should just be pulled gently out of its cream-colored bracket - don't try to pry the whole bracket away from the orange board. There are 2 clips on the bottom, and one on each side (4 clips total).
Note that you can still manipulate the buttons (eject, play, etc) after you take the front panel off.
3. Remove the metal bracket holding down the front of the drive assembly.
There are 2 screws to take out, then you have to apply a little outward pressure to get it off.
4. Remove drive assembly.
There is a green circuit board attached to the underside of the drive assembly. I did this kind of backwards and separated the two. This did give me a good stable footing when doing the soldering, but was probably much more trouble than it is worth.
Remove 2 gold screws on the top-left and top-right corners of the drive assembly. Remove a third gold screw from the top-left corner of the green board and the drive assembly. There may also be 2 gold screws on the corners of the green board. (the screws you need to remove are the ones that connect the bottom of the drive assembly to the orange board - not the top-most screws that keep the drive assembly cover on)
When pulling up the assembly and the green board together, there is a clip on the right side of the green board.
5.
Larger Image
6. Locate the fuse (F402).
The fuse is marked F402 in relatively big letters. There is a line from the "F402" marking to the two fuses. There are two fuses, one marked F402, one (I think) F401, and they are one above the other. It is straightforward enough by the markings, but it took me a while to be sure that I had the right one. The fuse itself has a marking of ".8"
7. Some helpful chap posted a graphic of the circuit board at http://www.vianet.net.au/~redfed/.
8. In attempting to locate the fuse, F402, be aware that the designation "F402", silk screened onto the green printed circuit board, may not necessarily be adjacent to the fuse. In highly dense circuits such as this, where there is no room for the letters, it is common practice to silk-screen-print a line leading away to an open space on the circuit board where in fact the printed letters appear. In our particular model, the designation "F402" was actually legibly printed down and to the right a couple of inches away, with a narrow white line leading back to the actual fuse.
9. The fuse is not of the type the "layman" is normally accustomed to seeing. It is instead what is called a "surface mount" fuse . Think of it like a small domino, 1/8" long by 1/16" wide by 1/16' thick, with tiny metallized end connections. It is soldered down onto the surface of the PC board where there are two solderable "pads" on the circuit board to accept it. This fuse, rated at 0.80 amp, is of a type made by several manufacturers. A virtually identical type, rated at 0.750 amps is made by littelfuse (www.littelfuse.com) Their part number R450.750 from their SMF fast acting series is the one we think of. They also have a version in what is called a "slow blow" type.
10. Rip off fuse cover.
Here's where it really gets unprofessional. I took my needlenose pliers around the wider sides of the fuse and just pulled at the fuse. I ripped of the cover of it, leaving a couple of metal things sticking up. (everything is very small at this point)
(A magnifying glass and flashlight, held by someone else, came in handy during steps 6 and 7.)
A more educated method: Remove the blown F402 fuse(that it is blown can be verified with a simple ohmeter if you are so technically inclined and able). It can be a little tricky to remove the fuse if you are not skilled in this. We did it by heating one end of the fuse and pulling that end up a little bit (about 1/16" or so) off the pad with a pair of needlenose pliers (tweezers would work) the other remaining side can then be similar lifted off its pad after heating that end. This kind of thing is very easy for folks used to working with surface mount components but is a bit of "microsurgery" for the uninitiated.
Another approach: "I removed the old fuse, although I couldn't really get in there even with a needle nose pliers. Instead, if you simply heat up the end of the fuse with a sharp soldering iron (it only took a second with my 25 Watt iron), you can just flick the fuse up using the tip of the iron. This will reveal two good-sized pads underneath (the leads come down on the outside and wrap underneath the fuse). "
11. Bypass fuse with solder.
There is certainly a better way to do this, but I just liberally put down solder so that I was sure the two metal things were connected. Everything is very close quarters so you really need a fine tip soldering iron.
A much more educated method:
In our case we replaced the blown fuse with a small piece of wire (approximately number 32--about .008" diameter) We obtained this wire by getting it from some stranded number #22 wire- removing one strand. We took a length of about two inches, tinned it with regular solder to ensure it would be solderable to the circuit board pads. We then cut off a length of about one inch. Carefully(an understatement) soldered one end of the wire to one of the fuse pad location. Ran the rest of the wire over the second pad and "tack soldered" it at the second pad and then cut off that extra 3/4" or so of wire which went beyond the pad.
The short piece of very thin wire which is now bridging the two fuse "pads" closes the circuit and acts as a new fuse. It is important to know that the new fuse probably will not blow unless there is a fault of maybe a couple of amps instead of the 0.8 amps of the original fuse. In other words, this new "fuse' is a very sloppy fuse. Nevertheless, it is good enough to prevent any real damage in the event of a major fault. In high current (above 5-10 or 30 amps) circuits, perhaps involving 110 volts AC line voltage, it would be dangerous to replace a fuse with wire because a fault could result in fire. In a very low voltage, low current circuit such as this, bridged by a fine gauge wire, such danger does not exist for the same reason that little circuits run off 9V batteries are always considered safe no matter what you do to them.
12. Congrats!
You've either fixed it or perhaps ruined it forever. Put the drive assembly back in place and test it out by inserting a disc. Then put everything back together the same way you took it apart.
Success/Failure Stories
So far, a couple people have killed their DVD player, so the success rate is around 90%. A couple people have had a different model than mine, with only one fuse, the F401, and this fix obviously doesn't work with no F402 fuse. I have no info on any different fixes.
I had been posting feedback from people here, but there is just too much to post now. Any feedback on the process in incorporated into the above instructions. As of October 2002, about 100 people have tried the fix.
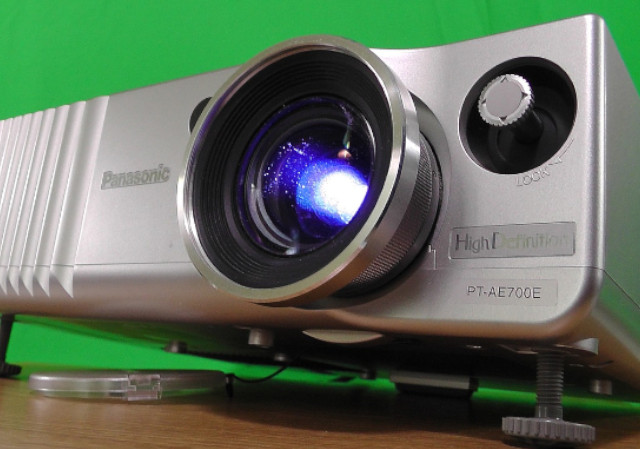
Replacement Players
I have bought the Panasonic DVD-RA60, which sells for about $120. It has all of the inputs/outputs of the Sony, and also plays MP3, CD-R/RW, and DVD-Auidio. Doesn't mention SACD, so it probably doesn't play that. It also has Dolby decoder which is a must for me because my reciever doesn't but is Dolby Digital ready.
Different Circuit Boards and DVD Player Models
Thanks for the Sony DVD info on your website. I've had a similar problem with my Sony 530D player, but apparently it uses a different controller board than the 560D. I don't see anything on my board that's labeled F for "fuse", and nothing appears to be burned out. Has anyone described how to fix this problem on the 530D? I'm tempted to buy a copy of the service manual.
- Joe Schwartz 6/18/2002
There are two boards that are used depending on the model (dvp-s360, dvp-s560d, dvp-s570d, dvp-c660, dvp-c670d and maybe the dvp-s335). One is a MB-86 and the other is a MB-87. There are also two versions of the MB-86 board. The old version requires the modification, the newer version does not. The new version does not have an F402 fuse. The old version requires modification where F402 is replaced with a jumper of wire or a zero ohm resistor and resistors R416 and R418 are replaced with 82Kohm 1/16watt resistors. The original values were 150Kohm.
My Sony DVP-S560D DVD player started having some of the same problems as other people have seen in this forum. Upon searching Google for an Error Message C:13:00, I ran across some VERY INTERESTING INFO!
My Sony DVD player has a hidden menu that comes up when you hit THREE Remote Keys in the following order: Title button, Clear button, and Power button! However, the Sony DVD player MUST be in the STANDBY MODE in order for these remote keys to work!
Follow the steps below to perform an adjustment that may clear up lots of problems with your SONY DVD player.
1. Turn on your TV & go to the Video Input your DVD player is attached to. My DVD player is connected to "Video 1".
2. With the Sony DVD Player in Standby Mode, Hit the REMOTE buttons, A. Title button, B. Clear button, and C. Power button.
3. You should see a TEST MODE MENU. Go down to the Drive Auto Adjustment menu.
4. Under Drive Auto Adjustment, go to Adjustment Menu. Under the Adjustment Menu, you will see five adjustments:
0. ALL
1. DVD-SL (Means Single Layer DVD)
2. CD
3. DVD-DL (Means Dual Layer DVD)
4. SACD
5. Put a single-layer DVD in the player. (It helps to insert a DVD that you have been having problems with!) The screen will tell you to do the steps to make the ADJUSTMENT. DO THE STEPS EXACTLY AS SHOWN! If you make a mistake in the steps, just go back and redo it from the start. I did this adjustment a couple times and it MUST be done in exact order shown or it will NOT do the proper single-layer adjustment.
6. Put a Dual-Layer DVD that you may have had problems with in the player. Once again, follow the same exact steps as for a single-layer DVD.
So far, doing these adjustments has done WONDERS for my Sony DVD player - which I was about to throw in the trash!
It's too bad you can not get any help from the Sony Tech Support people - especially the First-Layer Tech Support! All they want to do is try to SELL you another DVD player OR tell you to send your player in for a refurbished one! I 'suspect' Sony does the above adjustments and puts them back in their inventory to resell as refurbished units! (I have no proof of this, but it's just a hunch.)
What have you got to lose if you have a Sony DVD player and are having problems with it as I did?
Jim
February 2005

 howtomendit.com for free repair help, information and advice.